I just discovered this gem through twitter!
It’s an amazing project, born out of Netherland, that you should check out.
Enjoy Radio Garden
I just discovered this gem through twitter!
It’s an amazing project, born out of Netherland, that you should check out.
Enjoy Radio Garden
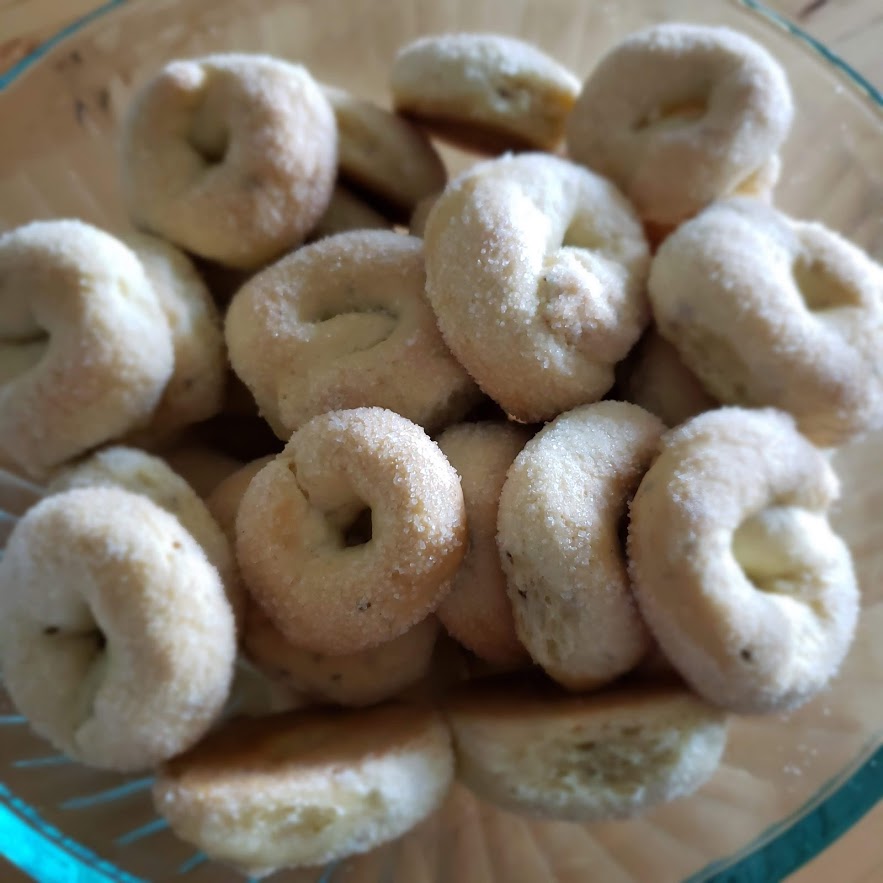
Ciambelline al vino (drunken donuts in English) are a typical delicacy of my land, Ciociaria (Lazio, Italy). Similar recipes, with their own twist, can be found across all Italy.
I remember my mom making Ciambelline regularly and how much I loved them as kid, but also as adult!
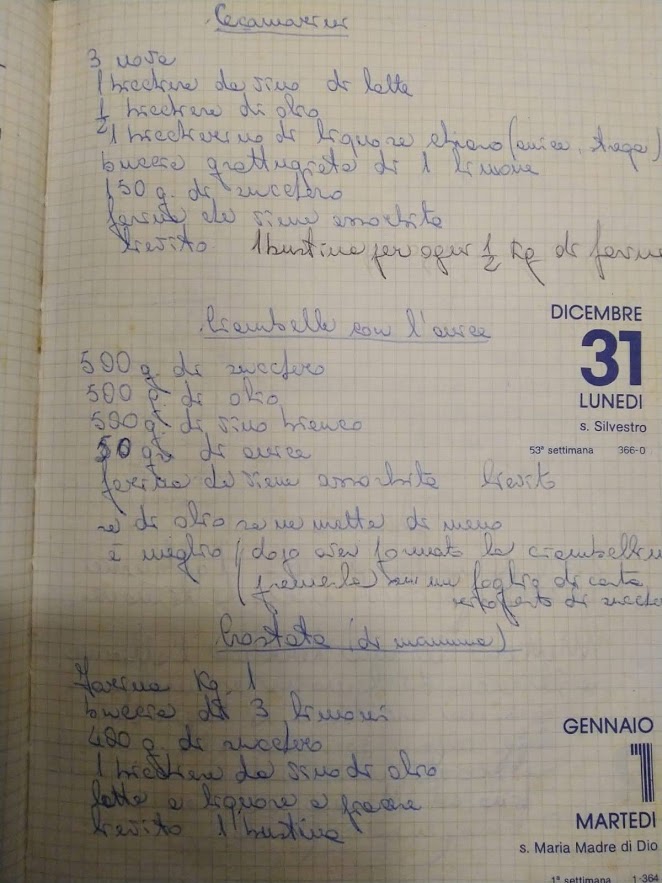
I found the recipe in her notebook and spoke to her to figure out the preparation, I also consulted another local blogs.
In this recipe all ingredients are measured by “glass” . Our parents used to do things by “eye” and adjust as needed. They didn’t use fancy appliances as we do now.
Pick a small glass in your home and use it as your “measurement”. I use small wine glasses that hold at least 150ml of water. You pick your own and adjust as needed.
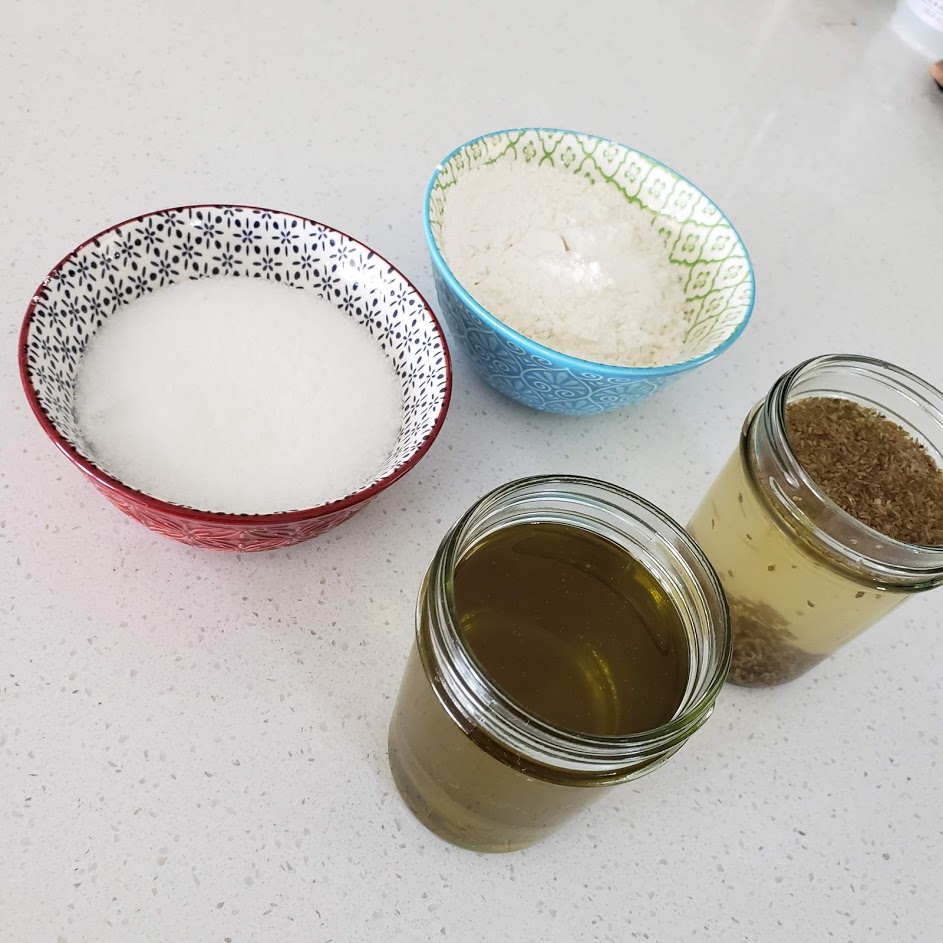
Ingredients
– 1 glass of extra virgin olive oil
– 1 glass of white wine
– 1 glass of sugar
– 1 tbsp. anise seeds
– 1/2 tbsp. baking soda
– Flour (3-4 glasses*)
*Flour must be added to bring the dough to the right consistency, so it will depends on the flour type.
Instructions
Start by soaking the anise seeds in the wine for about 30 minutes. Then combine all the ingredients except the flour in a bowl. Mix them well to make sure the sugar dissolves.
Now add one glass of flour and mix, then add another one. The dough will still be runny but now it’s time to start paying attention. As you add more flour, your dough will start to thicken, until it reaches the right moisture and consistency. Something that is not too sticky and you can work with your hands. I used the kitchenAid to work the dough, but a spoon and your hands should be fine as well


When your dough has reached the right consistency, you’re ready to prepare your donuts by hand.
Turn on your oven at 350F, prepare a couple of trays with parchment paper and complete your your “rolling station” with a plate filled with sugar!
This is how you roll:
– Take a small piece of dough from the bowl
– Roll it on a wooden surface (but any surface should work)
– When you have a tiny string of dough (about 1cm), fold it in a donut
– Now pass both sides of the donut into the sugar and place it on the tray
When you’ve worked all your dough, you’re ready to bake!
Mine took about 35 minutes to be ready. After 15m I rotated the trays for uniform cooking.
Let your donuts cool for about 30 minutes and they are ready for tasting!
You can keep them in an airtight container for weeks.


As you can see from the pictures, the Ciambelline were outstanding and delicious! Give this recipe a try!
It’s always struggle to find nutritious food to snack or to bring at work. My favorite is an healthy protein bar because it’s easy to carry and eat. I always wanted to do my own.
I tried many recipes, but couldn’t find one that was good, easy and consistent.
After a few attempts, I found a great recipe for sugar free and healthy protein bars.
I made some adjustments based on personal to speed up the process.
This recipe churns enough bars for a week, so you can do it over the weekend and enjoy it for the whole week.
Let’s go!

Ingredients
You need a food processor to powder the nuts. I use a Vitamix, but any food processor is fine.
Instructions
Put all the nuts (except a handful) and the oat into a food processor. Pulse until they are reduced to a powder.
This is the base for your bars.
Separately, chop the nuts that you previously set apart. This will give your bars a delicious texture and crunchiness.
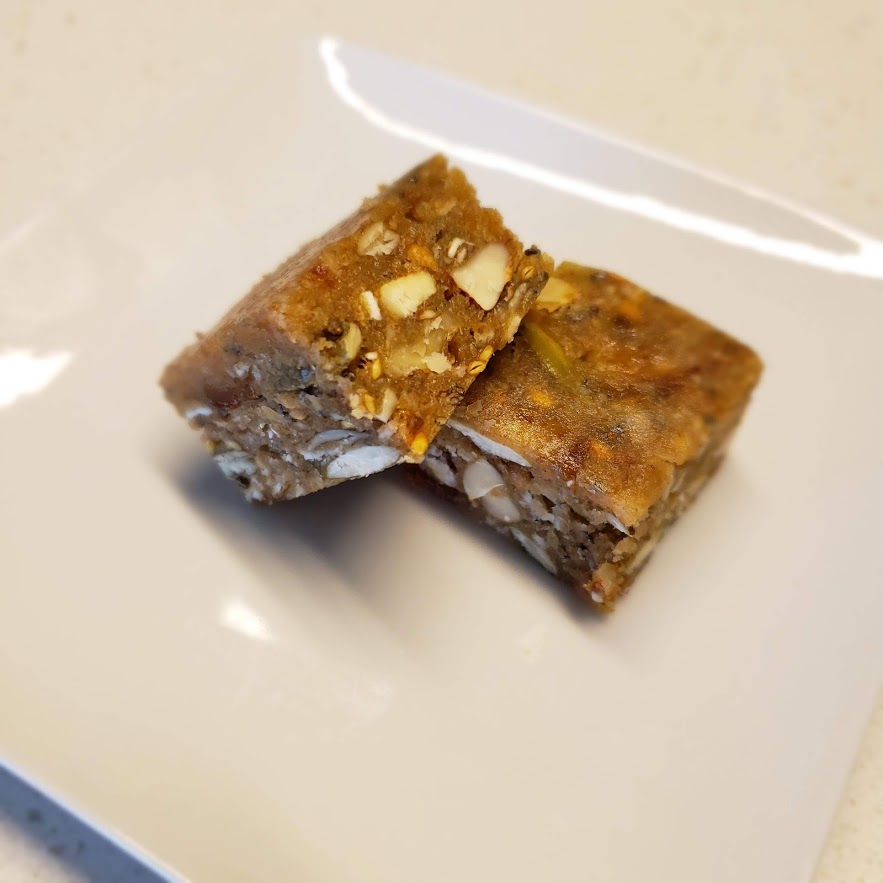
Check below the size and consistency of my chunks and poweder.


Now process the dates and reduce them to a paste.
Combine it with the powdered and chunky nuts and add all the seeds (chia, flax and pumpkin).
Mix all the ingredients until they are well combined. If the mix feels wet, add more oat, one tablespoon at time.
The mixture must feel not too sticky or you’ll have hard time making the bars.
Transfer the mixture on a tray, covered with parchment paper. Flatten the mixture and use an extra parchment paper sheet to press it well.
Put it in the fridge for about an hour to settle. Then take it out and you’re ready to cut the bars.


Cut the bars in the size you like. I prefer mine in 1 inch squares.
Store the bars in a airtight container. If stored correctly, they last 2-3 weeks.
Try them and let me know!
I’ve been searching for a good recipe to make easy Italian bread at home. I found it!
This recipe is a slam dunk! It’s the easiest way to make foolproof Italian bread with very little effort! All you need is 5 ingredients and a Dutch oven! I promise, you won’t be disappointed.
Let’s get started!

Ingredients
– 400 gr of Flour
– 300 ml water
– 2 gr Yeast
– 1 Tsp salt
– 1/2 Tsp sugar
Instructions
First, put the dry ingredients into a medium bowl, mix them together. Then, add water and until all ingredients blend together nicely.
Now seal the bowl with its lid or with a plastic wrap and let it rest for 15 minutes.
Then, mix the dough again inside the bowl with your hands or with a spatula.
Let it rest again for 15 minutes, then mix one more last time.
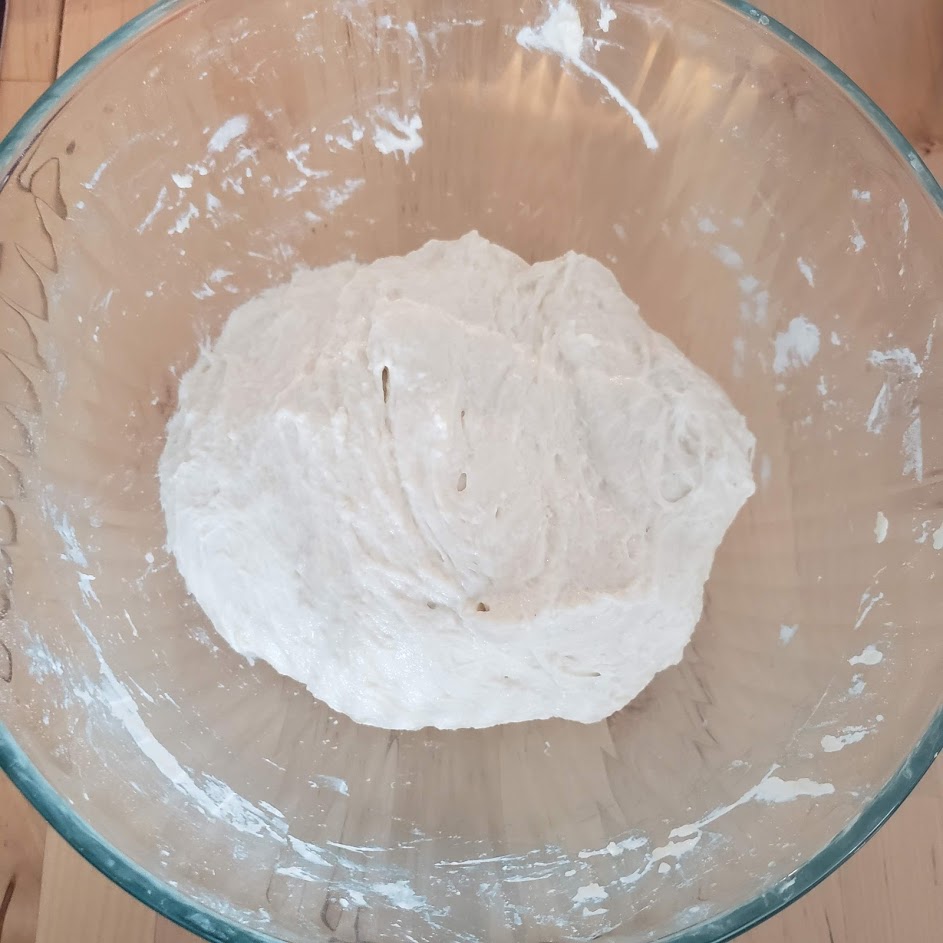
The dough should look like this.
Now, leave your bowl in your fridge sealed for 12 to 24 hours. I like to do my dough in the evening, so I can let it rest overnight.
This is the time needed by the yeast to do its magic. The longer it takes, the lighter your bread will be!
After 12-24 hours, take your dough off the fridge: it’s time to work it with your hands, time to get dirty!
You can check my technique in the video below.
You’ve worked the dough like in the video. Flatten it on a surface, fold it a couple of times and turn it into a ball. This is the most important part of the process. The structure of your bread depends on this work!
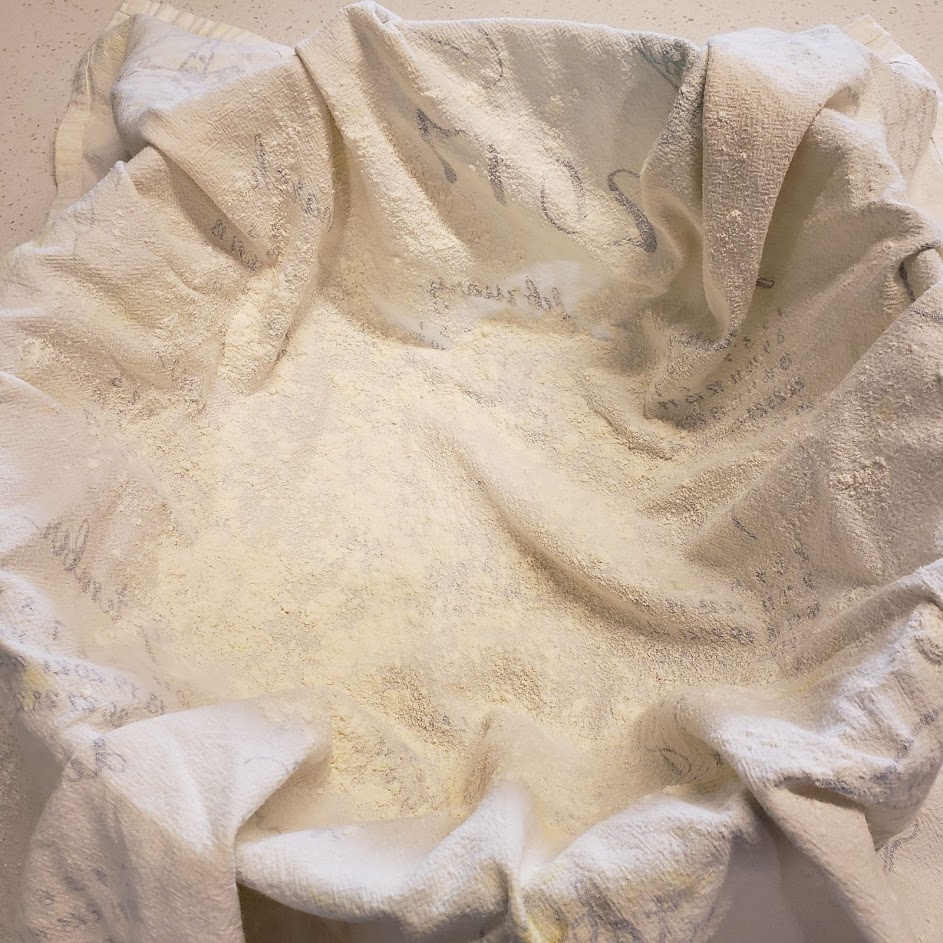
Once done, place your dough, gently, in a bowl covered with a cloth that has been generously sprinkled with flour. The flour will prevent the dough to stick to the cloth.
Cover the dough with the cloth and let it rest and rise for about 90 minutes.
Let your dough rises and set your oven at 450F let it warm with your Dutch oven inside.
After the 90 minutes have passed, gently place your dough into the Dutch Oven, cover it and put it back in the oven.
Let it cook for 30 minutes.
Now remove the lid and let it cook for 20 more minutes at 430F.
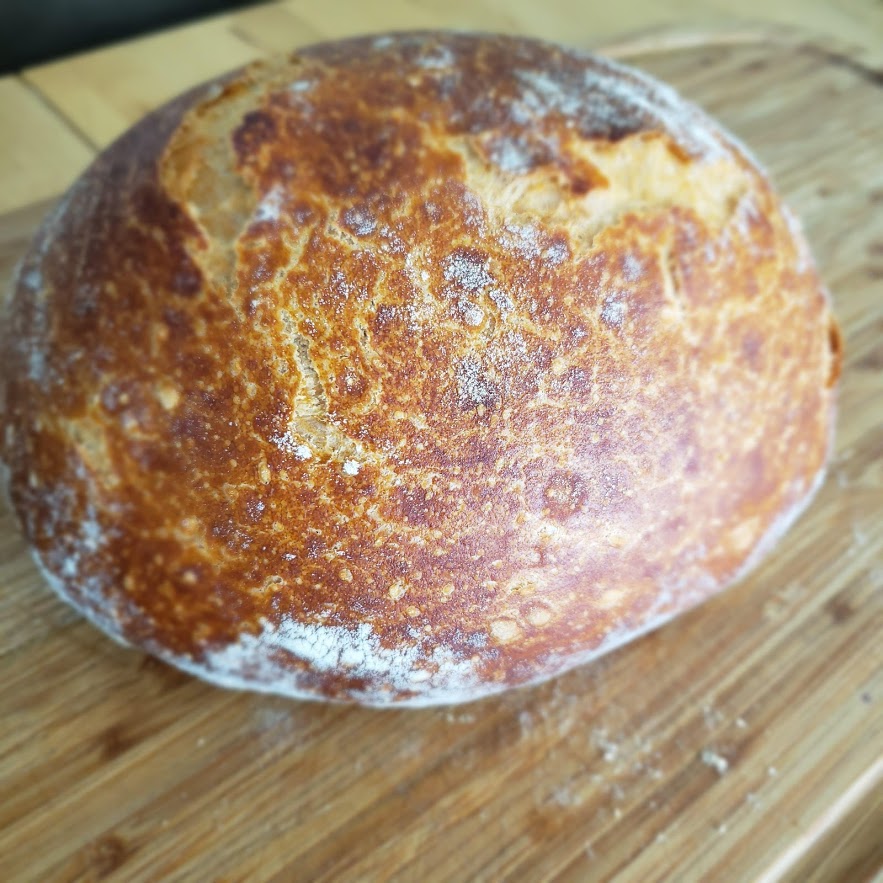
Your bread is now ready to go. Take it off the Dutch oven and let it cool for about 20/30 minutes.
It should look something like this
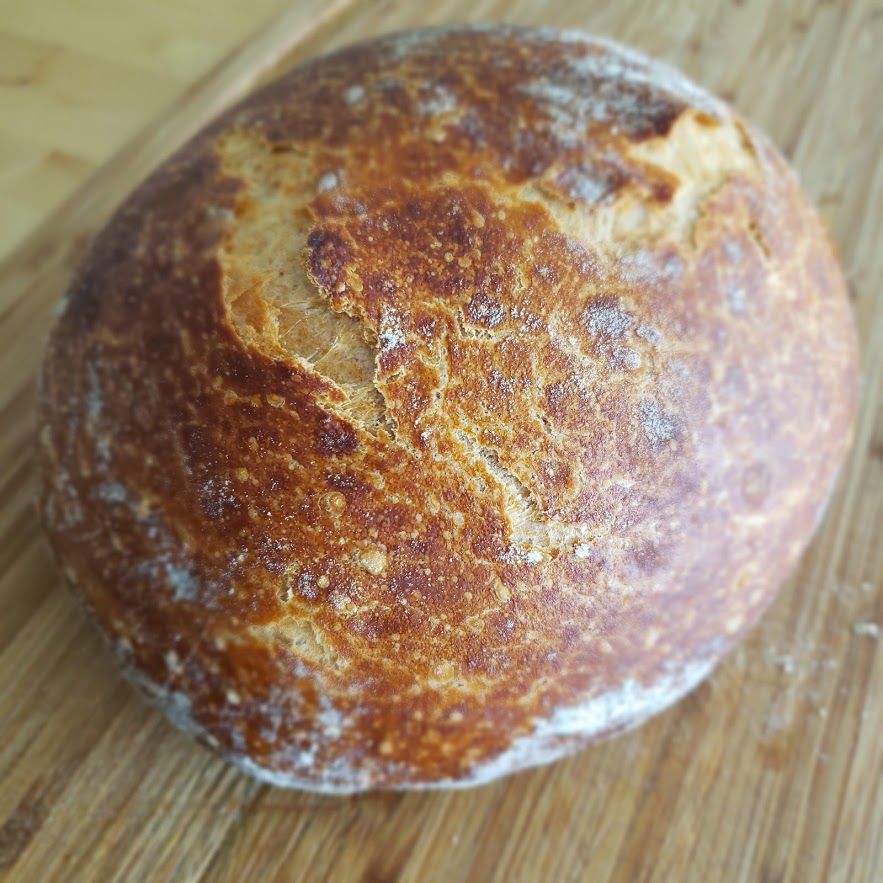


Let your loaf cool for 20-30 minutes and you’re ready to cut it and taste it.
Enjoy!

 It’s Saturday morning, the day after Prince’s death. The house is empty and I’m streaming a radio from Minnesota that has been playing every Prince’s song alphabetically (Alphabet St., pun intended) for the last 36 hours!
Musicology, the song that made me fall in love with him again, is playing now. No better time to wrap up my thoughts.
Flashback to when I was 12/13. Why did I pick Prince as my artist?
His music, his style, his being different, the dirty lyrics?
Probably all of them, in a word, this magical kingdom called Paisley Park.
“And life won’t be so bad
In Paisley Park” – Paisley Park, Around the World in a Day
Through his art, we visited this magical place, Anil’s words get to the point, where it’s OK to rewrite common sense, be whoever you want, enjoy life.
I like to remember Prince through his music, more than everything else. A few of my favorite lyrics and articles follow.
Be with me darling till the end of time
I’ll give you my heart
I’ll give you my mind
I’ll give you my body
I’ll give you my time
My favorite song: Adore, Sign o’ the Times
We want to play in the sunshine
We want to be free
Without the help of a margarita or ecstacy
We want to kick like we used to
Sign up on the dotted line
We gonna dance every dance
Like it’s gonna be the last time
One of the most joyous songs: Play in the sunshine, Sign o’ the Times

Whats the matter with your life
Is the poverty bringing u down?
Is the mailman jerking u round?
Did he put your million dollar check
In someone elses box?
Can’t stop singing it: Pop Life, Around the World in a Day
Everybody on this earth has got a vice
And mine, little darlin’, mine is the opposite of ice
Mine is the running hot water of the daughter of morality
One of his hottest and naughtiest songs: Temptation, Around the World in a Day
Good evening. This is your pilot Prince speaking.
You are flying aboard the Seduction 747
And this plane is fully equipped with anything your body desires
If for any reason there is a loss in cabin pressure
I will automatically drop down to apply more
Another dirty one: International Lover, 1999
To night it’s gonna be scandalous
Cause to night I’m gonna be your fantasy
Slow and sweet: Scandalous, Batman
You don’t have to be rich to be my girl
You don’t have to be cool to rule my world
Ain’t no particular sign I’m more compatible with
I just want your extra time and your kiss
Kiss, Parade
In my daddy’s car
It’s you I really want to drive
Underneath the stars
I really get a dirty mind
Whenever you’re around
Dirty dirty dirty song: Dirty Mind, Dirty Mind
People call me rude, I wish we all were nude
I wish there was no black and white, I wish there were no rules
we’re all the same: Controversy, Controversy

I’m not a woman
I’m not a man
I am something that you’ll never understand
I would die 4 U, Purple Rain
Dearly beloved
We are gathered here today
To get through this thing called life
Best Guitar riff: Let’s go Crazy, Purple Rain
Hey, look me over
Tell me do you like what you see?
Hey, I ain’t got no money
But honey, I’m rich on personality
Badass: Baby I’m a Star, Purple Rain
You walked in, I woke up
I’ve never seen a pretty girl
Look so tough, baby
You got that look
Pure energy: U Got the Look, Sign o’ the Times
And I said, baby don’t waste your time
I know what’s on your mind
I may be qualified for a one night stand
But I could never take the place of your man
Best performed live: I could never take the place of your man, Sign o’ the Times
If a man is considered guilty
For what goes on in his mind
Then give me the electric chair
For all my future crimes-oh!
Electric Chair, Batman
More thoughts, lyrics and articles about my favorite artist.
“a sex symbol devoted to romance and pleasure, not power or machismo”, Prince, an Artist Who Defied Genre, Is Dead at 57 (NYTimes)
“Today is a very sad day. His music rearranged me… he will forever be my #1.” – Halle Berry
“A strong spirit transcends rules,’ Prince once said—and nobody’s spirit was stronger, bolder, or more creative.” —President Obama
“A tiny, svelte thing. Ethnically ambiguous, radiating lust. What is this? A man. Clearly a man. No. Not just a man. A Prince.”, On Prince, blackness, and sexuality (Fusion)
Prince Remembered: 15 of His Most Iconic Fashion Moments – US Weekly


Prince is gone! He was the fist artist I actively listened. I was 12.
I discovered music listening to Purple Rain, 1999 and Sign ‘o the Time.
For many years, he was my idol, for his music, the style and the message he brought to us.
I still remember most of his lyrics and can sing most of his songs.
Prince thought us that it’s ok to be ourselves, no matter what.
Trying to think of my favorite songs: Adore, Let’s go crazy, 1999, Controversy, I would die 4 U, International lover, …
As I read my twitter, I thought I could save a few for you all:
Prince Street station, NYC, tonight: pic.twitter.com/SHr5nbGI2y
— Maureen Johnson (@maureenjohnson) April 21, 2016
In honor of Prince, an early look at next week’s cover, “Purple Rain”: https://t.co/lF0Nwyd7q8 pic.twitter.com/myN15OxsCO
— The New Yorker (@NewYorker) April 21, 2016
“‘A strong spirit transcends rules,’ Prince once said—and nobody’s spirit was stronger, bolder, or more creative.” —President Obama
— Barack Obama (@BarackObama) April 21, 2016
A purple nebula, in honor of Prince, who passed away today. https://t.co/7buFWWExMw pic.twitter.com/ONQDwSQwVa
— NASA (@NASA) April 21, 2016
15 of Prince’s most iconic fashion moments: https://t.co/LogwRW4Wrd pic.twitter.com/wiXyPHEmqZ
— Us Weekly (@usweekly) April 21, 2016
Niagara Falls turned purple on the day Prince died: https://t.co/BYOnTsjRk1 pic.twitter.com/PYZhzPTOWz
— Consequence of Sound (@coslive) April 21, 2016
11 Songs You Didn’t Realize #Prince Wrote, From ‘Manic Monday’ to ‘Stand Back’ (Videos) https://t.co/bYaYvdV2Xw pic.twitter.com/DQjP64g2xB
— TheWrap (@TheWrap) April 21, 2016
 The most merciful thing in the world, I think, is the inability of the human mind to correlate all its contents. We live on a placid island of ignorance in the midst of black seas of infinity, and it was not meant that we should voyage far. The sciences, each straining in its own direction, have hitherto harmed us little; but some day the piecing together of dissociated knowledge will open up such terrifying vistas of reality, and of our frightful position therein, that we shall either go mad from the revelation or flee from the deadly light into the peace and safety of a new dark age.
The Call of Cthulhu, whole story here
Starting today, I will post a brief weekly summary of the the best articles I found online.
https://dzone.com/articles/how-a-scrum-team-adopted-continuous-delivery
What’s next in computing? (by @cdixon)
An article about the evolution of software, hardware, AI and VR
I read a lot about the Open Web
Time to channel my Inner Dave Winer (by Joi Ito)
Anywhere but Medium & What I mean by “the open web” (by Dave Winer)
An Open Web (e-book)
The U.S. Has Lost Its Damn Mind
A final word for Umberto Eco, who passed last week.
I haven’t posted in ages. Food is bringing me back…
As way of background, I blogged about New York City at first, about tech and food.
I love food: eating it as well as cooking it.
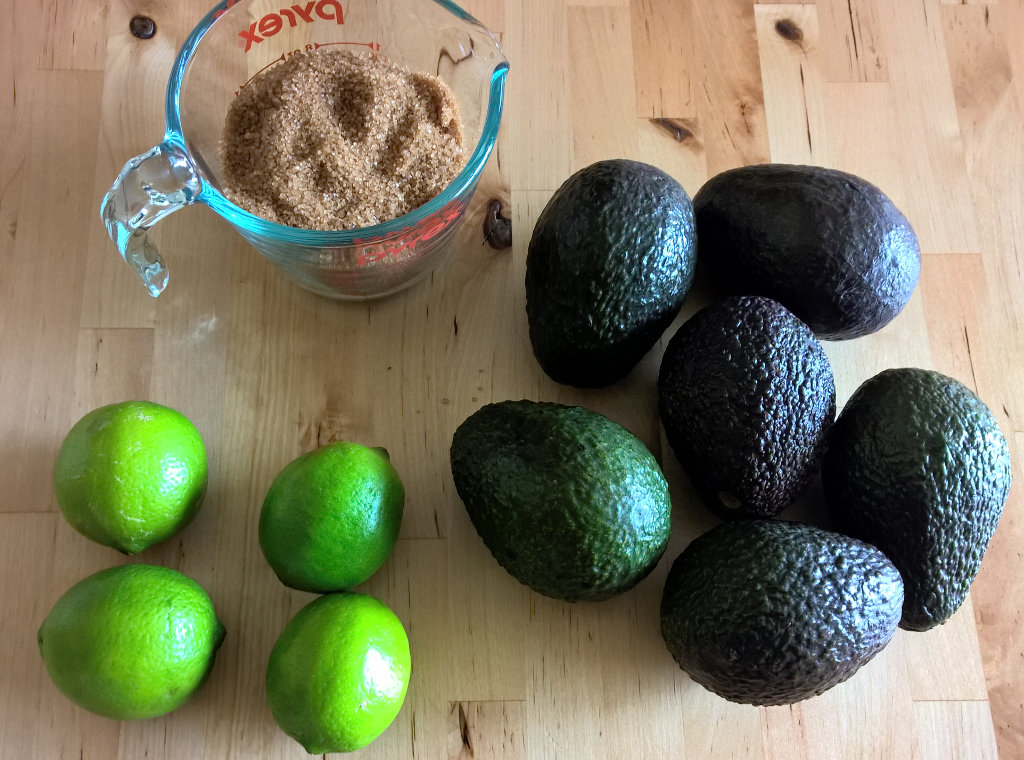
Today I made Vegan avocado lime ice cream, Recipe courtesy found on Serious Eats!
I won’t go through the recipe into details, as you can find it in the link above.
Also, preparation is quite simple.
Put avocado, sugar, water, lime zest and juice in a blender and blend until smooth.
Refrigerate the mixture for a few hours, until very cold.
Then churn it in your ice cream maker. I use the Kitchen Aid ice cream maker attachment!
Transfer it to an airtight container and chill for a few hours, until firm.
Scoop into a bowl, and enjoy it!
[…] the Avocado lime ice cream, we decided to make it a tradition: prepare a new dish every week. Last Sunday I tried Kaldereta, a […]
Powered by WordPress